WebAssembly Supports
WebAssembly support is currently experimental, and you may encounter unexpected errors. If you do, please report them via our GitHub Issues or Discord channel so we can address them promptly.
Ailoy supports running agents entirely in modern web browsers using WebAssembly (WASM). This enables AI workloads directly in the browser with no backend required.
Key capabilities
- Run local models accelerated by WebGPU—supports both LangModels and EmbeddingModels.
- Use API models just like you would in native environments.
- Register your own custom tools or MCP tools (via Streamable HTTP transport) on agents.
- Use vector stores to construct a RAG pipeline.
This guide walks you through setting up and using ailoy-web in your
browser-based applications.
Hardware Requirements
If you plan to run local models with WebGPU, make sure your system has the necessary hardware accelerators and drivers installed. See Supported Environments for more details.
- MacOS with Apple Silicon: Fully supported, typically works out of the box.
- Windows / Linux with NVIDIA or AMD GPUs: Ensure that the latest GPU drivers are installed.
In addition, WebGPU must support certain features—such as shader-f16. You can
quickly verify your setup using the isWebGPUSupported utility:
import { isWebGPUSupported } from "ailoy-web";

const { supported, reason } = await isWebGPUSupported();
if (supported) {
  // WebGPU is supported
  console.log("✅ WebGPU is available!");
} else {
  // WebGPU is not supported
  console.log(
    "❌ WebGPU is not available due to the following reason: ",
    reason
  );
}
If WebGPU is not supported, consider showing users a clear message in your UI
that explains why—using the reason value returned by the function.
Building a Simple Chat UI
In this tutorial, we're going to build a simple chat UI application using Ailoy. You can see the full example codes in our repository.
Setup Vite and install ailoy-web
We recommend using Vite for a fast development environment and optimized builds. Still you can use another build tools you prefer, such as Webpack, Rollup, or Parcel.
In this example, we use Vite to create a project with React + TypeScript configuration.
- Let's create a Vite project by running
npm create vite@latest.
$ npm create vite@latest
> npx > create-vite
│ ◇ Project name: │ my-project │ ◇ Select a framework: │ React │ ◇ Select a variant: │ TypeScript │ ◇ Scaffolding project in /path/of/my-project... │ └ Done. Now run:
cd my-project npm install npm run dev
- Next, navigate to your new project and install
ailoy-web. This will also install packages preconfigured inpackage.json.
$ cd my-project $ npm install ailoy-web
added 265 packages, and audited 266 packages in 4s
64 packages are looking for funding run
npm fundfor detailsfound 0 vulnerabilities
- To ensure optimal performance and compatibility, update your
vite.config.tswith the following settings:- Exclude
ailoy-webfrom dependency optimization (optimizeDeps.exclude) - Enable cross-origin isolation (required for
SharedArrayBufferin WASM threading) - Optimize bundle size by grouping
ailoy-webinto its own build chunk
- Exclude
import react from "@vitejs/plugin-react";
import { defineConfig } from "vite";

export default defineConfig({
  plugins: [react()],
  optimizeDeps: {
    exclude: ["ailoy-web"],
  },
  server: {
    headers: {
      "Cross-Origin-Embedder-Policy": "require-corp",
      "Cross-Origin-Opener-Policy": "same-origin",
    },
  },
  build: {
    rollupOptions: {
      output: {
        manualChunks: {
          ailoy: ["ailoy-web"],
        },
      },
    },
  },
});
Install and configure assistant-ui
For this quick demo, we'll use assistant-ui package to create a basic chat interface.
It relies on shadcn, so we'll set that up first. Follow the guide from shadcn's documentation.
- Edit
tsconfig.json.
{
  "files": [],
  "references": [
    {
      "path": "./tsconfig.app.json"
    },
    {
      "path": "./tsconfig.node.json"
    }
  ],
  "compilerOptions": {
    "baseUrl": ".",
    "paths": {
      "@/*": ["./src/*"]
    }
  }
}
- Edit
tsconfig.app.json
{
  "compilerOptions": {
    // ...
    "baseUrl": ".",
    "paths": {
      "@/*": ["./src/*"]
    }
    // ...
  }
}
- Install
tailwindand updatevite.config.ts.
$ npm install --save-dev tailwindcss @tailwindcss/vite @types/node
added 22 packages, and audited 215 packages in 3s
51 packages are looking for funding run
npm fundfor detailsfound 0 vulnerabilities
import path from "node:path";
import tailwindcss from "@tailwindcss/vite";
import react from "@vitejs/plugin-react";
import { defineConfig } from "vite";

// https://vite.dev/config/
export default defineConfig({
  plugins: [react(), tailwindcss()],
  resolve: {
    alias: {
      "@": path.resolve(__dirname, "./src"),
    },
  },
  // other configs
});
- Update
src/index.cssto use tailwindcss.
@import "tailwindcss";
- Install
assistant-uiand add thread component.
npx assistant-ui add thread
$ npx assistant-ui add thread
✔ You need to create a components.json file to add components. Proceed? … yes
✔ Which color would you like to use as the base color? › Neutral
✔ Writing components.json.
✔ Checking registry.
✔ Installing dependencies.
✔ Created 6 files:
- src/components/assistant-ui/thread.tsx
- src/components/assistant-ui/markdown-text.tsx
- src/components/assistant-ui/tooltip-icon-button.tsx
- src/components/assistant-ui/tool-fallback.tsx
- src/components/ui/button.tsx
- src/components/ui/tooltip.tsx
- Install
framer-motionpackage which is required byassistant-ui's thread.
npm install framer-motion
$ npm install framer-motion
up to date, audited 374 packages in 696ms
141 packages are looking for funding run
npm fundfor detailsfound 0 vulnerabilities
- Due to
"verbatimModuleSyntax": trueconfiguration, you need to fixsrc/components/assistant-ui/tool-fallback.tsxto prevent compile error.
import type { ToolCallMessagePartComponent } from "@assistant-ui/react";
import { CheckIcon, ChevronDownIcon, ChevronUpIcon } from "lucide-react";

// ...
Implementation
We use assistant-ui's ExternalStoreRuntime feature to ingest messages converted from states where raw messages are stored in Ailoy format.
- Let's start from writing conversion logics from Ailoy's
MessageandMessageDeltato assistant-ui'suseExternalMessageConverter.Message.
Createsrc/AiloyRuntimeProvider.tsxand write the code as follow:
import { useExternalMessageConverter } from "@assistant-ui/react";
import * as ai from "ailoy-web";

function imageDataToBase64(arr: Uint8Array): string {
  let binaryString = "";
  arr.forEach((byte) => {
    binaryString += String.fromCharCode(byte);
  });
  const base64String = btoa(binaryString);
  return base64String;
}

function convertMessage(
  message: ai.Message
): useExternalMessageConverter.Message {
  if (message.role === "user") {
    return {
      role: message.role,
      content: message.contents.map((part) => {
        if (part.type === "text") return part;
        else if (part.type === "image") {
          if (part.image.type === "binary") {
            return {
              type: "image",
              image: `data:image/png;base64,${imageDataToBase64(
                part.image.data
              )}`,
            };
          } else {
            return { type: "image", image: part.image.url };
          }
        } else if (part.type === "value")
          return { type: "text", text: part.value!.toString() };
        else throw Error("Unknown content type");
      }),
    };
  } else if (message.role === "assistant") {
    let contents = [];
    if (message.thinking) {
      contents.push({
        type: "reasoning",
        text: message.thinking,
      });
    }
    if (message.tool_calls) {
      for (const toolCall of message.tool_calls) {
        if (toolCall.type !== "function")
          throw new Error("tool call content should be a type of function");
        contents.push({
          type: "tool-call",
          toolCallId: toolCall.id,
          toolName: toolCall.function.name,
          args: toolCall.function.arguments,
        });
      }
    }
    for (const content of message.contents) {
      if (content.type === "text") {
        contents.push(content);
      }
    }
    return {
      role: message.role,
      content: contents,
    } as useExternalMessageConverter.Message;
  } else if (message.role === "tool") {
    let toolResult: string;
    if (message.contents[0].type === "text") {
      toolResult = message.contents[0].text;
    } else if (message.contents[0].type === "value") {
      toolResult = JSON.stringify(message.contents[0].value);
    } else {
      throw new Error("Tool result should be either text or value.");
    }
    return {
      role: "tool",
      toolCallId: message.id,
      result: toolResult,
    } as useExternalMessageConverter.Message;
  } else {
    throw new Error(`Unknown message type: ${message}`);
  }
}

function convertMessageDelta(
  delta: ai.MessageDelta
): useExternalMessageConverter.Message {
  if (delta.role === "assistant") {
    let contents = [];
    if (delta.thinking !== undefined) {
      contents.push({
        type: "reasoning",
        text: delta.thinking,
      });
    }
    if (delta.tool_calls.length > 0) {
      for (const toolCall of delta.tool_calls) {
        if (toolCall.type !== "function")
          throw new Error("tool call content should be a type of function");
        if (toolCall.function.type === "verbatim") {
          contents.push({ type: "text", text: toolCall.function.text });
        } else if (toolCall.function.type === "with_string_args") {
          contents.push({
            type: "text",
            text: `{"name": "${toolCall.function.name}", "arguments": ${toolCall.function.arguments}}`,
          });
        } else {
          contents.push({
            type: "text",
            text: `{"name": "${toolCall.function.name}", "arguments": ${toolCall.function.arguments}}`,
          });
        }
      }
    }
    for (const content of delta.contents) {
      if (content.type === "text") {
        contents.push(content);
      }
    }
    return {
      role: "assistant",
      content: contents,
    } as useExternalMessageConverter.Message;
  } else if (delta.role === "tool") {
    let toolResult: string;
    if (delta.contents[0].type === "text") {
      toolResult = delta.contents[0].text;
    } else if (delta.contents[0].type === "value") {
      toolResult = JSON.stringify(delta.contents[0].value);
    } else {
      throw new Error("Tool result should be either text or value.");
    }
    return {
      role: "tool",
      toolCallId: delta.id,
      result: toolResult,
    } as useExternalMessageConverter.Message;
  } else {
    // Consider this case as an empty assistant message
    return {
      role: "assistant",
      content: [],
    };
  }
}
- Write
AiloyRuntimeProvidercomponent as follow:
"use client";

import { useState, useEffect, useMemo, type ReactNode } from "react";
import {
  AssistantRuntimeProvider,
  useExternalStoreRuntime,
  useExternalMessageConverter,
  type AppendMessage,
} from "@assistant-ui/react";
import * as ai from "ailoy-web";

/// Conversion logics

export function AiloyRuntimeProvider({
  children,
}: Readonly<{ children: ReactNode }>) {
  const [agent, setAgent] = useState<ai.Agent | undefined>(undefined);
  const [agentLoading, setAgentLoading] = useState<boolean>(false);
  // This stores the complete messages
  const [messages, setMessages] = useState<ai.Message[]>([]);
  // This stores the ongoing accumulated message delta
  const [ongoingMessage, setOngoingMessage] = useState<ai.MessageDelta | null>(
    null
  );
  const [isAnswering, setIsAnswering] = useState<boolean>(false);

  useEffect(() => {
    (async () => {
      // Check if WebGPU is available first
      const { supported, reason } = await ai.isWebGPUSupported();
      if (!supported) {
        alert(`WebGPU is not supported: ${reason!}`);
        return;
      }

      setAgentLoading(true);

      // Initialize the agent with local LangModel
      const agent = new ai.Agent(
        await ai.LangModel.newLocal("Qwen/Qwen3-0.6B")
      );
      setAgent(agent);

      setAgentLoading(false);
    })();
  }, []);

  const onNew = async (message: AppendMessage) => {
    if (agent === undefined) throw new Error("Agent is not initialized yet");

    // Add text content
    if (message.content[0]?.type !== "text")
      throw new Error("Only text messages are supported");

    // Append a new user message
    const newMessage: ai.Message = {
      role: "user",
      contents: [{ type: "text", text: message.content[0].text }],
    };
    setMessages((prev) => [...prev, newMessage]);

    setIsAnswering(true);
    let accumulated: ai.MessageDelta | null = null;
    for await (const { delta, finish_reason } of agent.runDelta([
      ...messages,
      newMessage,
    ])) {
      // Store accumulated message delta
      accumulated =
        accumulated === null
          ? delta
          : ai.accumulateMessageDelta(accumulated, delta);
      setOngoingMessage(accumulated);

      // Finish the delta and append to messages on `finish_reason` arrived
      if (finish_reason !== undefined) {
        let newMessage = ai.finishMessageDelta(accumulated);
        setMessages((prevMessages) => [...prevMessages, newMessage]);
        setOngoingMessage(null);
        accumulated = null;
      }
    }
    setIsAnswering(false);
  };

  // Converted messages derived from raw messages and message delta
  const convertedMessages: useExternalMessageConverter.Message[] =
    useMemo(() => {
      let converted = messages.map(convertMessage);
      if (ongoingMessage !== null) {
        let convertedDelta = convertMessageDelta(ongoingMessage);
        converted = [...converted, convertedDelta];
      }
      return converted;
    }, [messages, ongoingMessage]);

  // Create ExternalStoreRuntime
  const runtime = useExternalStoreRuntime({
    isLoading: agentLoading,
    isDisabled: agent === undefined,
    isRunning: isAnswering,
    messages: useExternalMessageConverter({
      messages: convertedMessages,
      callback: (msg) => msg,
      isRunning: isAnswering,
    }),
    onNew,
  });

  return (
    <AssistantRuntimeProvider runtime={runtime}>
      {children}
    </AssistantRuntimeProvider>
  );
}
- Update
src/App.tsxto wrap<Thread />inside<AiloyRuntimeProvider>.
import { Thread } from "@/components/assistant-ui/thread";
import { AiloyRuntimeProvider } from "./AiloyRuntimeProvider";

function App() {
  return (
    <AiloyRuntimeProvider>
      <Thread />
    </AiloyRuntimeProvider>
  );
}

export default App;
- React’s
<StrictMode>can cause components to mount twice during development.
To avoid double state updates, remove<StrictMode>fromsrc/main.tsx:
// import { StrictMode } from 'react'
import { createRoot } from 'react-dom/client'
import './index.css'
import App from './App.tsx'

createRoot(document.getElementById('root')!).render(
  // <StrictMode>
    <App />
  // </StrictMode>,
)
- Start the development server with
npm run dev.
$ npm run dev
VITE v7.1.1 ready in 318 ms
➜ Local: http://localhost:5173/ ➜ Network: use --host to expose ➜ press h + enter to show help
- Visit http://localhost:5173 — your chat UI should be live.
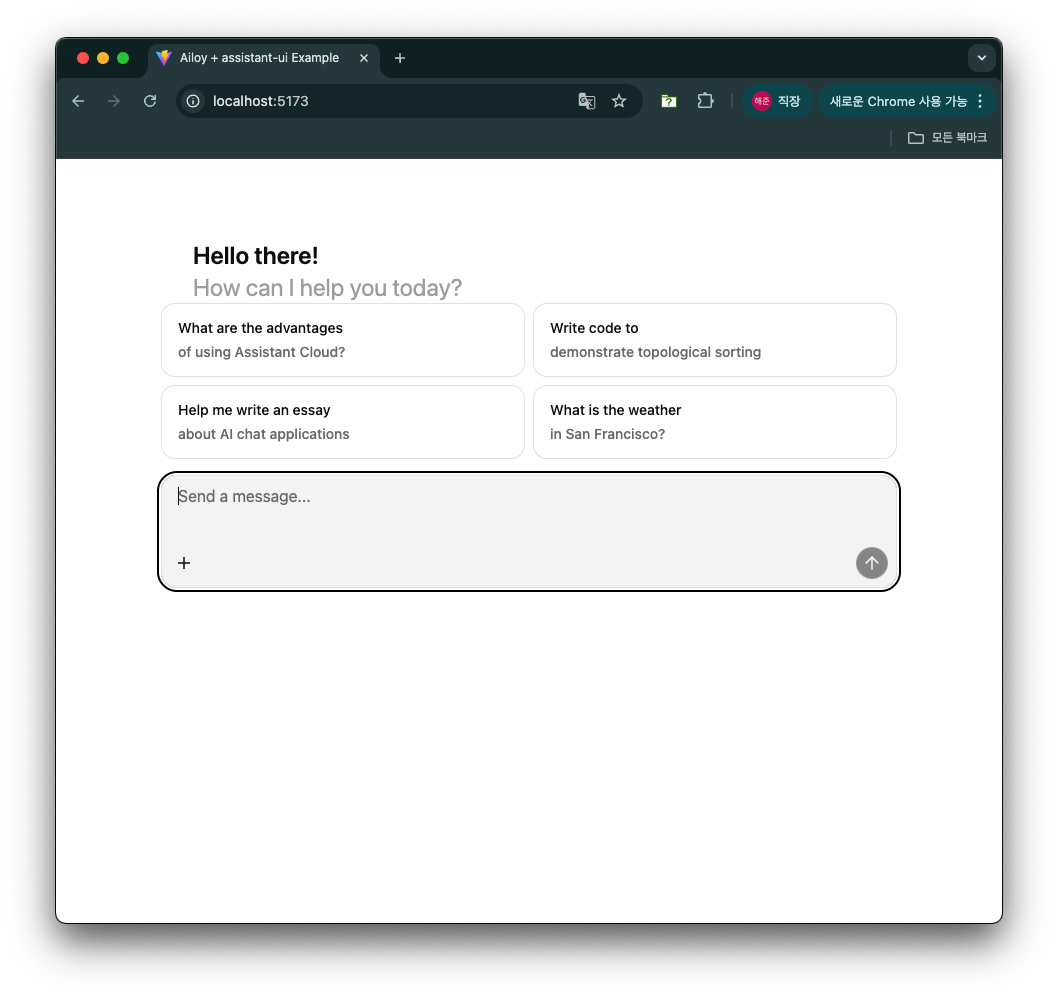
When the agent initializes for the first time, model parameters are downloaded from Ailoy’s file server. These files are stored in the browser’s Origin Private File System(OPFS) which is isolated per origin and managed internally by the browser.
Once initialization completes, you can start chatting with the agent.
- Try to start a conversation with the agent running on your web browser.
🎉 Congratulations! You now have a fully local AI agent running entirely in your browser with zero backend servers!
Additional Features
Using API models
You can easily switch to API models by changing the model configuration as below.
const agent = new ai.Agent(
  // await ai.LangModel.newLocal("Qwen/Qwen3-0.6B")
  await ai.LangModel.newStreamAPI(
    "OpenAI",
    "gpt-5-mini",
    "<YOUR_OPENAI_API_KEY>"
  )
);
You can use any API models listed in Available Models.
The above code is for test purpose. You should never hardcode your API keys in your frontend codes! For example, consider making an input box to get API key from users and initialize agents using the key.
Multi-Modal Inputs
Image inputs are currently supported only on API models as described in Image Inputs.
Follow the guide in assistant-ui's Attachments documentation to enable file attachment functionality.
Install attachment UI component.
$ npx shadcn@latest add "https://r.assistant-ui.com/attachment"
Similar to what we did for Thread component, edit
src/components/assistant-ui/attachment.tsx as below to fix compile error.
import { type PropsWithChildren, useEffect, useState, type FC } from "react";
import { CircleXIcon, FileIcon, PaperclipIcon } from "lucide-react";
Edit src/components/assistant-ui/thread.tsx to add attachment components.
import {
  ComposerAttachments,
  ComposerAddAttachment,
  UserMessageAttachments,
} from "./attachment";

// Update Composer
const Composer: FC = () => {
  return (
    <div ...>
      <ThreadScrollToBottom />
      <ThreadPrimitive.Empty>
        <ThreadWelcomeSuggestions />
      </ThreadPrimitive.Empty>
      <ThreadPrimitive.Empty>
        <ComposerAttachments />
      </ThreadPrimitive.Empty>
      <ComposerPrimitive.Root ...>
        // ...
      </ComposerPrimitive.Root>
    </div>
  )
}

// Update ComposerAction
const ComposerAction: FC = () => {
  return (
    <div ...>
      <ThreadPrimitive.If running={false}>
        <ComposerAddAttachment />
      </ThreadPrimitive.If>
      // ...
    </div>
  )
}

// Update UserMessage
const UserMessage: FC = () => {
  return (
    <MessagePrivitive.Root asChild>
      <motion.div
        // ...
      >
        <UserMessageAttachments />
        <UserActionBar />
        // ...
      </motion.div>
    </MessagePrivitive.Root>
  )
}
In src/AiloyRuntimeProvider.tsx, update onNew to handle image contents.
const onNew = async (message: AppendMessage) => {
  if (agent === undefined) throw new Error("Agent is not initialized yet");

  let userContents: ai.Part[] = [];

  // Add attachments
  if (message.attachments !== undefined) {
    for (const attach of message.attachments) {
      // Add image content
      if (attach.type === "image") {
        const ab = await attach.file!.arrayBuffer();
        const arr = new Uint8Array(ab);
        const imagePart = ai.imageFromBytes(arr);
        userContents.push(imagePart);
      }
      // other types are skipped
    }
  }

  // Add text content
  if (message.content[0]?.type !== "text")
    throw new Error("Only text messages are supported");
  userContents.push({ type: "text", text: message.content[0].text });

  // Append a new user message
  const newMessage: ai.Message = {
    role: "user",
    contents: userContents,
  };
  setMessages((prev) => [...prev, newMessage]);

  // ...
Add adapters on useExternalStoreRuntime to handle image file attachments.
import {
  CompositeAttachmentAdapter,
  SimpleImageAttachmentAdapter,
  SimpleTextAttachmentAdapter,
} from "@assistant-ui/react";

const runtime = useExternalStoreRuntime({
  // ...
  adapters: {
    attachments: new CompositeAttachmentAdapter([
      new SimpleImageAttachmentAdapter(),
      new SimpleTextAttachmentAdapter(),
    ]),
  },
});
You don't need to modify the message conversion logics further, since it already handles image type contents.
Now you can attach images and ask about them.
Reasoning
Follow the guide in assistant-ui's Reasoning documentation to enable reasoning UI.
Install reasoning UI component.
$ npx assistant-ui@latest add reasoning
Pass the Reasoning and ReasoningGroup components to the
MessagePrimitive.Parts component in src/components/assistant-ui/thread.tsx:
import {Reasoning, ReasoningGroup} from "./reasoning";

const AssistantMessage: FC = () => {
  return (
    <MessagePrimitive.Root asChild>
      // ...
      <div className="...">
        <MessagePrimitive.Parts
          components={{
            // ...
            Reasoning,
            ReasoningGroup,
          }}
        />
      </div>
      // ...
    </MessagePrimitive.Root>
  )
}
Now you can see how reasoning is visualized by adding agent config as follow:
for await (const { delta, finish_reason } of agent.runDelta(
  [...messages, newMessage],
  {
    inference: {
      thinkEffort: "enable",
    },
  }
)) {
  // ...
}
Using Tools
You can register tools to agents with the same APIs as described in Using Tools. Let's add a simple tool and see how the tool calls and results are handled.
Define calculator-add tool and register to agent as below.
const agent = ...;

const tool = ai.Tool.newFunction(
  {
    name: "calculator-add",
    description: "Get two numbers and return the addition.",
    parameters: {
      type: "object",
      properties: {
        a: {
          type: "integer",
          description: "The first number",
        },
        b: {
          type: "integer",
          description: "The second number",
        },
      },
    },
  },
  async (args: { a: number; b: number }) => {
    return args.a + args.b;
  }
);
agent.addTool(tool);
Test the tool calling with the prompt that might invoke the calculator-add
tool.
Using MCP Tools
You can initialize MCP clients and use their tools in agents via Streamable HTTP transport. Note that stdio transport is not supported in browsers because they cannot run a stdio process.
When connecting to MCP servers from browsers, make sure the server is configured
to use CORS middleware with allowing your origins and exposing required
headers such as Mcp-Session-Id. See
the official documentation
for more details.
Let's create a simple MCP server for testing MCP tools availability.
Install the following packages.
$ npm install express cors zod @modelcontextprotocol/sdk
$ npm install --save-dev @types/express @types/cors
Create src/mcpServer.ts and write the code as below:
import { McpServer } from "@modelcontextprotocol/sdk/server/mcp.js";
import { StreamableHTTPServerTransport } from "@modelcontextprotocol/sdk/server/streamableHttp.js";
import cors from "cors";
import express, { type Request, type Response } from "express";
import * as z from "zod/v3";

// Create an MCP server
const server = new McpServer({
  name: "demo-server",
  version: "1.0.0",
});

// Add an addition tool
server.registerTool(
  "add",
  {
    title: "Addition Tool",
    description: "Add two numbers",
    inputSchema: { a: z.number(), b: z.number() },
  },
  async ({ a, b }) => ({
    content: [{ type: "text", text: String(a + b) }],
  })
);

const app = express();
app.use(express.json());
app.use(
  cors({
    origin: "*",
    exposedHeaders: "*",
  })
);

app.post("/mcp", async (req: Request, res: Response) => {
  try {
    const transport = new StreamableHTTPServerTransport({
      sessionIdGenerator: undefined,
    });
    res.on("close", () => {
      transport.close();
      server.close();
    });
    await server.connect(transport);
    await transport.handleRequest(req, res, req.body);
  } catch (error) {
    if (!res.headersSent) {
      res.status(500).json({
        jsonrpc: "2.0",
        error: {
          code: -32603,
          message: "Internal server error",
        },
        id: null,
      });
    }
  }
});

const PORT = 3000;
app.listen(PORT, () => {
  console.log(`MCP server listening on ${PORT}`);
});
Note that we used zod/v3 since the current latest version of MCP sdk does not
work with zod v4.
(related issue)
This MCP server runs on streamable HTTP transport and has a single tool add
which takes two numbers and return the addition. The server runs on
localhost:3000 and uses CORS middleware to allow any origins.
Install vite-node and add a script in package.json to run this server using
vite-node.
$ npm install --save-dev vite-node
  "scripts": {
    // ...
    "dev:mcp": "vite-node src/mcpServer.ts"
  }
Run the MCP server.
$ npm run dev:mcp
> my-project@0.0.0 dev:mcp > vite-node src/mcpServer.ts
MCP server listening on 3000
In src/AiloyRuntimeProvider.tsx, add MCP tools after the agent has been
initialized.
const agent = ...;

const mcpClient = await ai.MCPClient.streamableHttp("http://localhost:3000/mcp");
agent.addTools(mcpClient.tools);
Check if MCP tools work as expected.
Using Vector Stores
You can interact with Vector Stores in Ailoy Web using the same APIs described in RAG Using Documents.
When combined with local embedding models and in-memory vector stores such as Faiss, you can build a fully client-side RAG application that runs entirely inside the user's browser—no backend servers required. This approach is ideal for privacy-preserving, offline-capable AI assistants.
Creating an EmbeddingModel
import * as ai from "ailoy-web";

const em = await ai.EmbeddingModel.newLocal("BAAI/bge-m3");
Creating a VectorStore
import * as ai from "ailoy-web";

// Using an in-memory Faiss vectorstore
const vectorstore = await ai.VectorStore.newFaiss(1024);

// Using an external ChromaDB server
const vectorstore = await ai.VectorStore.newChroma(
  "http://localhost:8000", // Replace with your ChromaDB endpoint
  "my-collection",  // Your target collection name
);
When using external vector stores such as ChromaDB, make sure they're configured to use CORS middleware to allow your origin. For ChromaDB, refer the CORS configuration.
Inserting Documents
Before you can retrieve documents, you must insert them into the vector store along with optional metadata.
Typically, you'll chunk your text into smaller pieces before insertion for better retrieval accuracy.
const items = [
  {
    document:
      "BGE M3 is an embedding model supporting dense retrieval, lexical matching and multi-vector interaction.",
    metadata: { topic: "bge-m3" },
  },
  {
    document:
      "BM25 is a bag-of-words retrieval function that ranks a set of documents based on the query terms appearing in each document",
    metadata: { topic: "bm25" },
  },
];

for (const item of items) {
  const embedding = await em.infer(item.document);
  const result = await vectorstore.addVector({ embedding, ...item });
  console.log(result); // Example: "1"
}
Retrieving Documents
You can retrieve the most relevant documents by similarity score, which is computed using vector embeddings.
const queryEmbedding = await em.infer("What is BGE-M3?");
// Retrieve the top 1 item most similar to the query
const retrievedItems = await vectorstore.retrieve(queryEmbedding, 1);
console.log(retrievedItems);
// Expected: returns the document related to "bge-m3"
Clearing the Vector Store
If you need to reset or remove all entries from the vector store:
await vectorstore.clear();